Tuesday, April 5, 2016

Birds Under Glass


I was stuck at home recently with a repairman...
I decided to do another quick decoupage project.
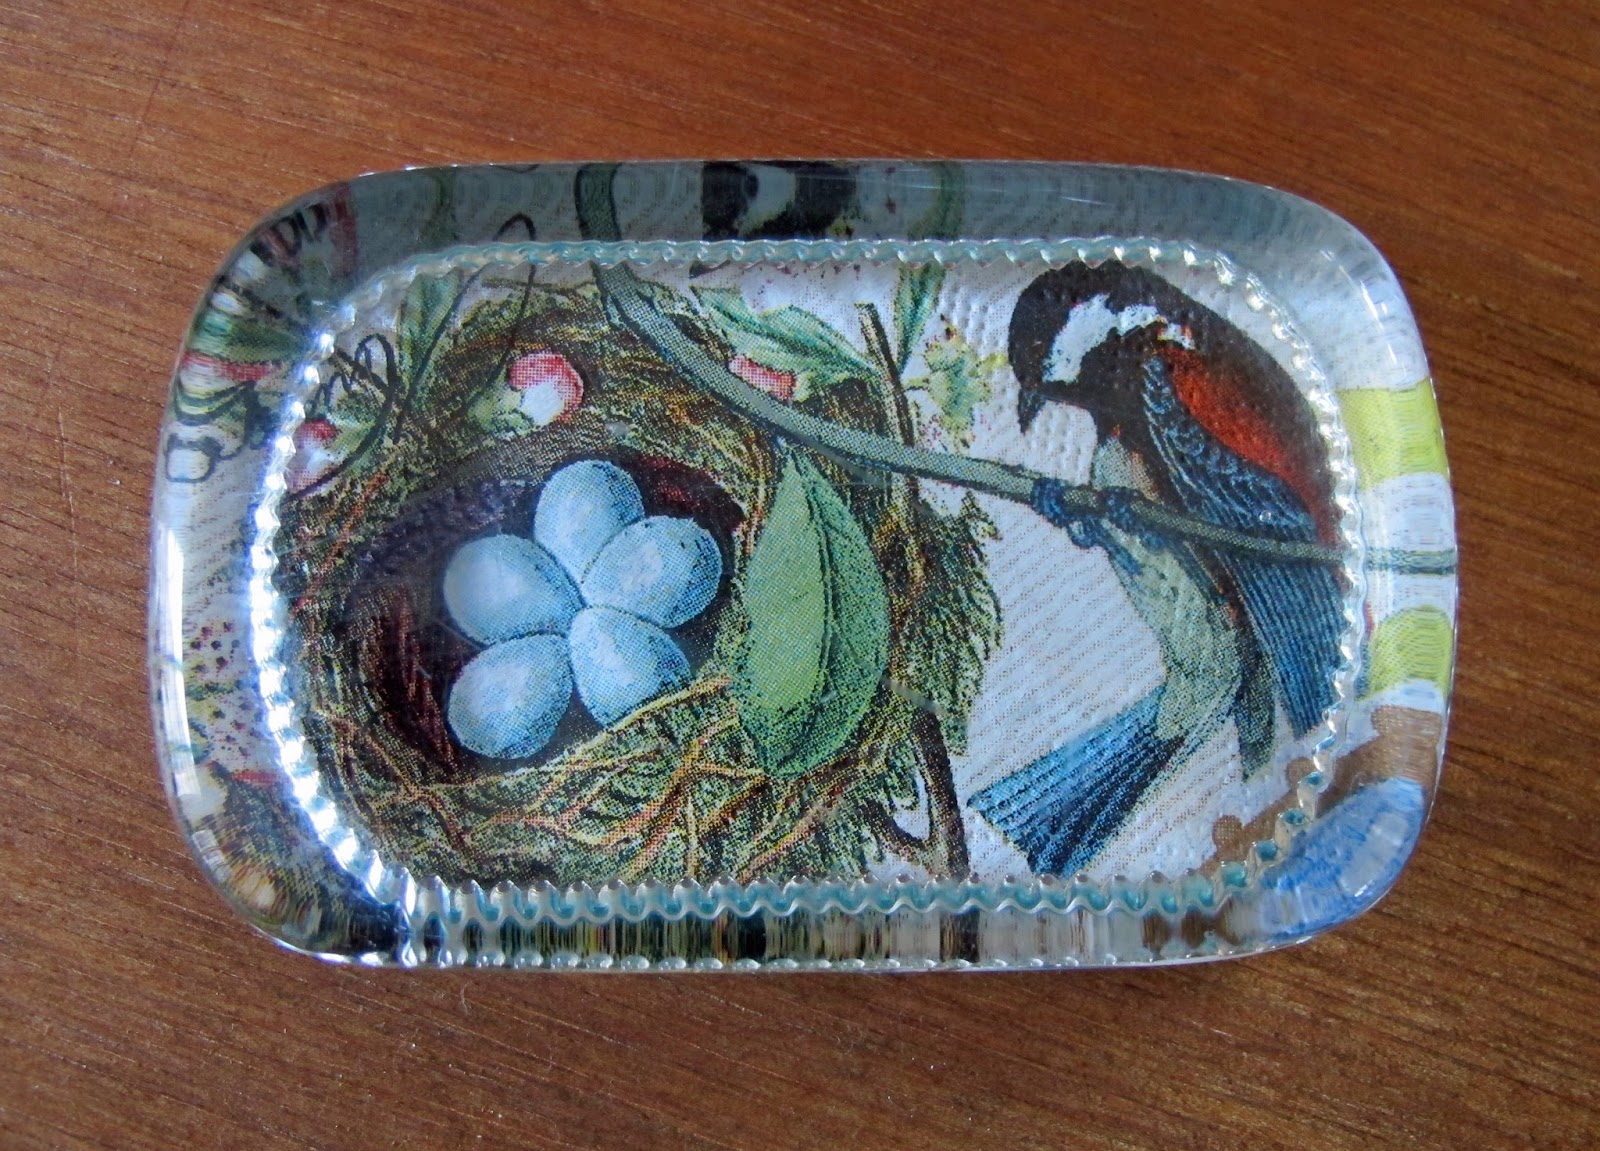
It's a vintage glass paperweight 
and I applied a bit of a pretty birds nest napkin to the underside of it.


I stole the idea from my friend Kim, who made one for me a few years ago. 
Here's the one she made for me.


I had picked up this glass paperweight at the flea market for a few bucks.


I like the detail on the bottom edge.


I cleaned it up and got busy.

Here's the napkin before I operated on it.


I set the paperweight over the section of the napkin I liked and traced around it.


Then I cut it out and peeled off a ply of the napkin.


I brushed a coat of Mod Podge onto the under side of the paperweight.
Then I applied the cutout section of the napkin to it, 
right side facing up, 


carefully smoothing out any bubbles and trimming off any excess napkin.


Those white wrinkles and spots will dry clear and not show.

Then I applied another coat of Mod Podge to the napkin and let it dry.

 I cut a small piece of fleece from my scrap pile 


and glued that to the bottom with some more Mod Podge.


It's so pretty and springy.
I love how it turned out.
You and also use this technique on glass plates and jars.
Hmmm.
I have a glass jar.  And more napkins.
See you later!


Linking to:
Metamorphosis Monday at Between Naps on the Porch
The Scoop at Stone Gable
Wow Us Wednesdays at Savvy Southern Style

Pin It!

Monday, March 28, 2016

A Perfect Plan for a Girl's Night In


It's early spring here in our area, 
Meaning it could be 60* tomorrow 
Or it could snow.
Or both.
It's too early to make any outdoor plans, so I've made an indoor one.
A Girl's Night In Party.

The plan includes my favorite movie of all time - 
 "Enchanted April"
and dinner with good friends.

Enchanted April is a wonderful, romantic film 
about women and friendship and love. 
Oh, and it's set on a hilltop medieval castle on the coast of Italy.
So it's a bit of a travelogue, too.
The scenery is glorious and the story is delightful.
It's based on the 1922 novel by Elizabeth Von Armin 
who wrote it while staying in Portofino, Italy, where the castle stands today.

I watched it again recently with my book club 
and we all enjoyed it.
I made an Italian dinner for us 
and then we curled up and watched the movie together


The menu was: 
Lots of Chianti 
Chicken Parmesan Baked Ziti  
Italian Salad 
Crusty bread 
and 
Tiramisu Cake.
Yummmmm.

Here's a link to the Chicken Parmesan Baked Ziti recipe from Gimme Some Oven.
I found the recipe on Pinterest.  
You can follow me on Pinterest here.

Chicken Parmesan Baked Ziti -- all you need are 6 simple ingredients for this comforting and delicious dish! | gimmesomeoven.com
(Photo from Gimme Some Oven)

I used Arrabiatta Sauce 
and I added some chopped pepperoni for more spicy flavor.
It was easy and delicious and I will definitely make this again.

I also made this easy Italian Salad from The Gingham Apron to go with it.
Another Pinterest find.

italian salad
(Photo from The Gingham Apron)

It was just right.

Here's a slice of the Tiramisu cake from a post I wrote abut the recipe.


Add a loaf of crusty bread and your favorite Chianti and you've got it all.

Delicious food and good friends and my favorite movie.
The perfect plan.

I enjoyed it all so much 
that I hijacked the next meeting of my other book club 
and we are going to watch the movie together too.
In April.
Perfect timing.

There are lots of ways to watch the movie.
You can buy the DVD or rent it from Amazon for $2.99.

You can read the book or you can listen to it.
Here's a link to the FULL audiobook, free, on YouTube.

You're welcome, because I just know you'll thank me!
It's Just Grand.


Linking to:
Metamorphosis Monday at Between Naps on the Porch
Inspire Me Monday at A Stroll Through Life
The Scoop at Stone Gable
Wow Us Wednesdays at Savvy Southern Style

Pin It!

Monday, February 29, 2016

Cover those outlets!


I have a pet peeve in kitchen design.

Well, several, actually.  
But for today, let's talk about outlets in kitchens.


Building codes typically require lots of electrical outlets 
to be placed where they make sense, on paper. 
In reality, those places don't always look attractive. 

In a kitchen, outlets are required every several feet in the back splash area.
Where do you put them if your back splash design is important to you 
and the outlets land smack in the middle of them?

I have been designing kitchens for 25+ years 
and this is not a new problem.
With all of the gorgeous, not to mention expensive tile choices available these days, 
good planning is necessary for the end result to look just right.

Nobody wants to end up with this.

                                                   Outlets galore!

I'm not the first person to rail against this problem.  
about outlets and lots of creative ideas to cover them.

In my own kitchen, I wanted an even simpler solution. 
 I didn't use tile, I used V-groove paneling for my back splash areas.


You can see the outlets in these early kitchen photos.


My strategy was to install the outlets horizontally 
and as low as I could talk the electrician into doing.
That way, you can just place something in front of the outlet 
to cover it.  

In the photo below, 
I had him squeeze one in to the corner 


so I could put a little lamp there and not see the outlet.


(Darling Daughter was just home for the weekend and left her mark, above)

I could have painted the outlet covers to match the painted wood, 
but I haven't bothered because I hung some vintage prints there 
and the outlets never show.


With the V-groove paneling, it's easy to pop a tiny nail into the wood 
and hang a artwork right over those offending outlets.

When I need to use this outlet, I just put the print aside 
and rehang it when I'm finished.


Same thing on the opposite side of the cook top.


The prints are nice because they don't take up any working counter space  
and that's always a priority for me.

I did the same thing in my trusty old oak kitchen...


If you have tile, you can always just lean prints 
or cutting boards against the outlets, too.


I love this look from Patina Farms. 
This could work in a back splash area too.


My island has outlets, too, but I buried them 
in the overhang space where the seats are-

Because I wanted to avoid doing this...


to this...


This end panel is too pretty to disfigure with an outlet, don't you think?


The outlets are barely noticeable under the overhang, as you can see below.


It's easy to sit at the island and plug in a laptop 
or plug in the mixer if I'm making cookies and want to spread things out.


So, cover those outlets.
That's my helpful little tip for the day.


Linking to:
Metamorphosis Monday at Between Naps on the Porch
Inspire Me Tuesday at A Stroll Through Life
The Scoop at Stone Gable

Pin It!